Monday, January 23, 2012

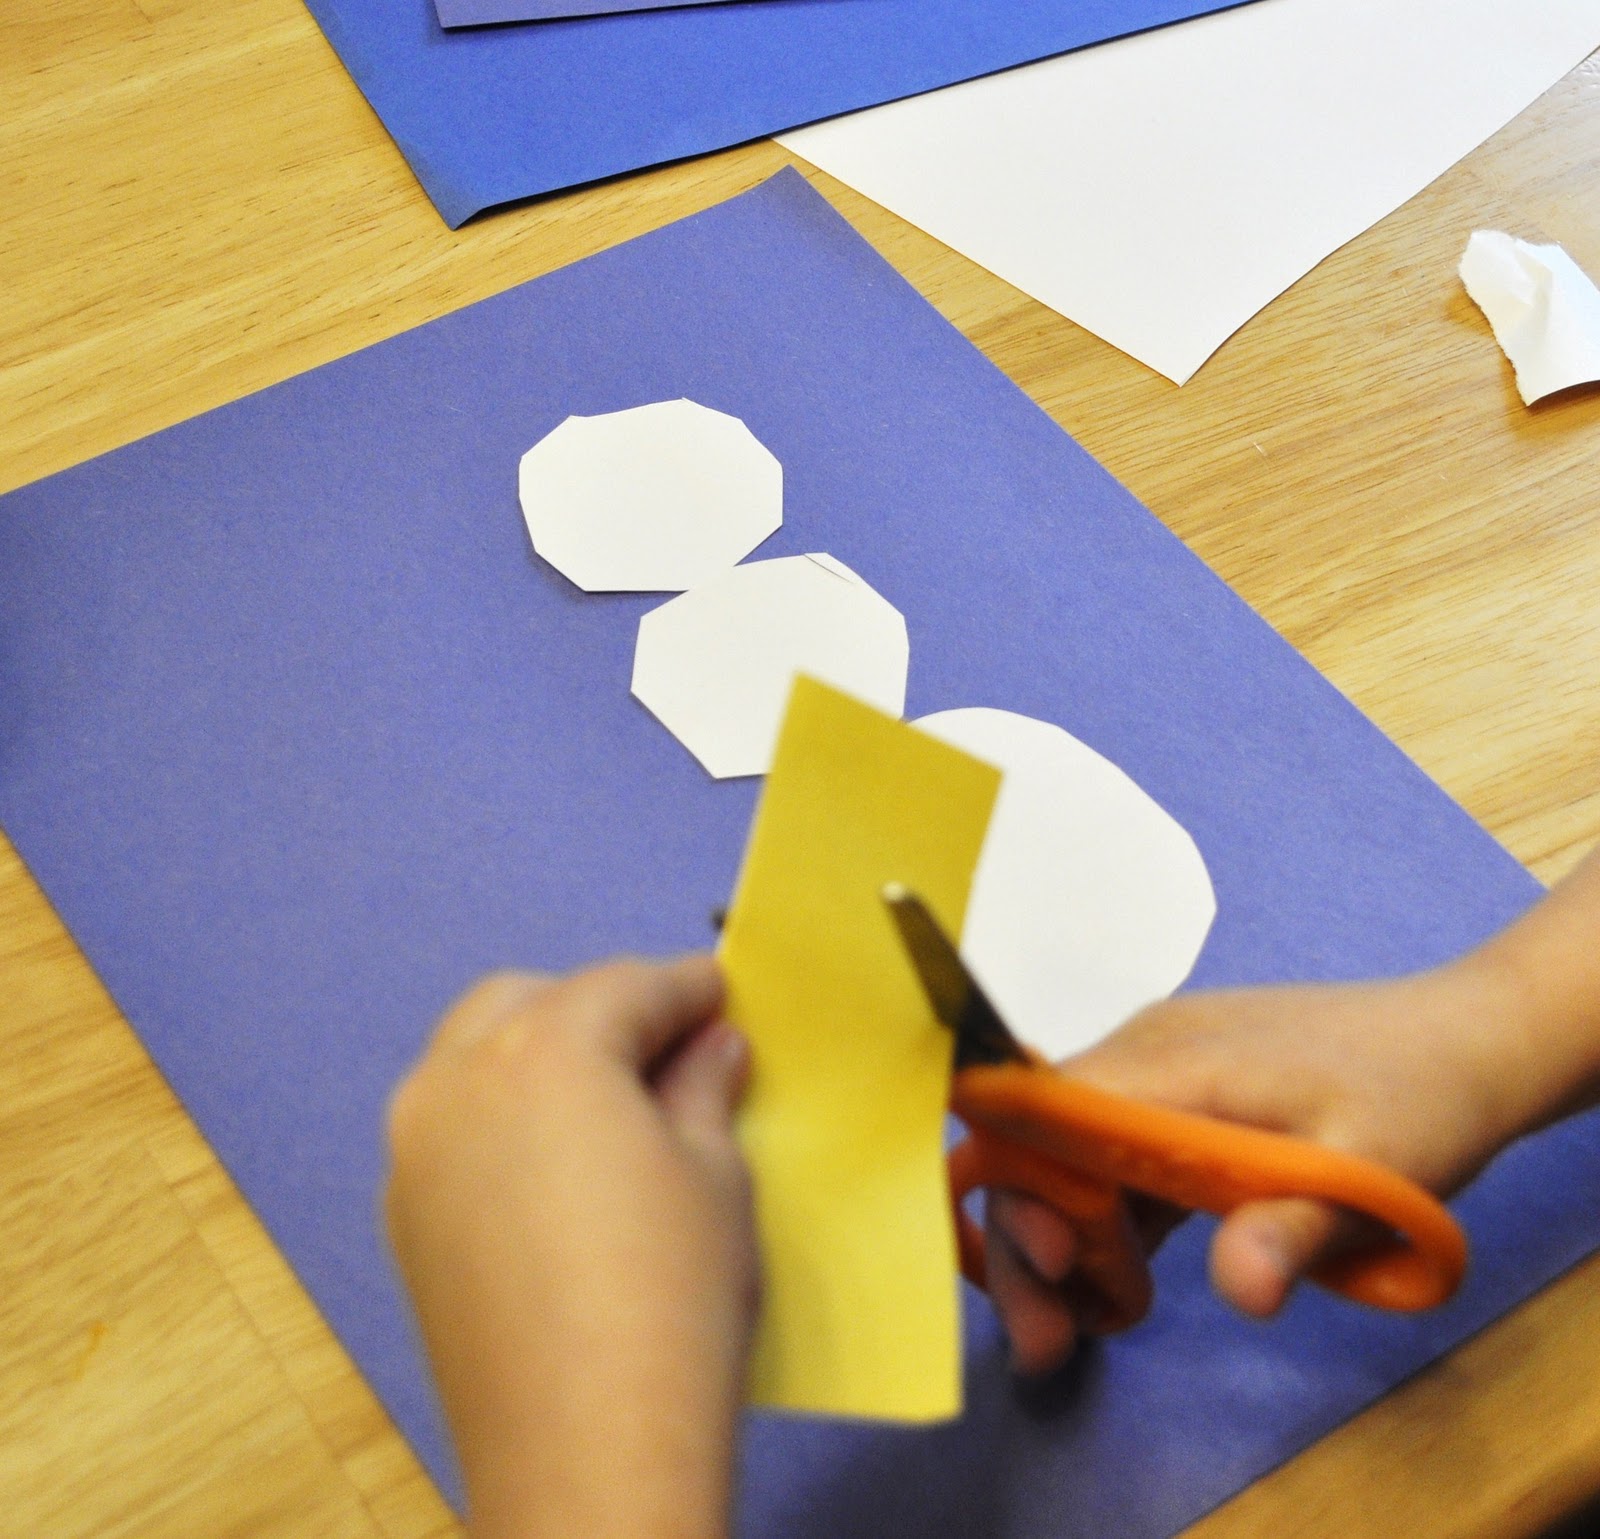
Torn-Paper Snowman

These torn-paper snowmen are helpful for building up the muscles in the hand (yay for small motor skills).  Tearing up stuff is fun, too!!  

Supplies:
  • Tagboard or cardboard
  • Pencil
  • Circle templates
  • Scissors
  • Glue
  • Paper


1)  On sturdy paper, trace three circles:  small, medium, and large.  I just looked around and used what we had to trace around.  Glue the circles together to form a snowman.

2)  Tear strips of white paper and glue to form the body.  Tear different colors and patterns for various body parts, buttons, etc.  We used paper from our scrap box.

Share your creations!

Labels:

Monday, January 16, 2012

Snowman Votive Holder

It's 65 degrees here today...and we haven't seen more than a dusting of snow in the last few months, but I've decided we're embarking on a winter theme!  

This Snowman Votive Holder makes a sweet gift for grandma or other loved one.

Supplies:
  • Votive Holder
  • White paint
  • Permanent markers
  • Tea-light candle


1)  Paint your child's index finger with white paint.  Carefully press onto the votive holder.  Repeat as many times as desired.  Allow to dry.


2)  Use permanent markers to add eyes, nose, mouth, buttons, arms, etc. to your snowman (or woman).


3)  Add a tea-light candle.

*Variation:  If you have multiple children, they could each make and decorate one snowman on the votive.

Labels:

Monday, December 12, 2011

Tasty Tuesday: Melted Snowman S'mores

I posted this last year, but I wanted to share it again -- especially since my sister made up some super-cute printable gift tags!

When my friend, Donna, shared these cute Snowman S'mores with me, I wanted to share them with you!!  Special thanks to her for sending me the photos and directions!!

Supplies:
Marshmallows
2 Tbsp. of canned icing
Wilton decorator food colors, orange and black (these make the truest colors instead of mixing the drops)
1 wooden skewer broken in half (use pointed end for painting nose, flat end for eyes and mouth)
Striped cookies
Cellophane bags (if desired)
Printable Directions/Gift Tags


1)  Mix 1 T. frosting with orange food coloring.  Melt in the microwave.  Repeat with the black coloring and frosting.  (This will make enough for a bag of marshmallows.)  Make an orange nose on the rounded sides of all the marshmallows with the pointed end of the skewer.  After the noses are finished, add the eyes and mouth with black frosting (using the blunt end of the skewer).


2)  Place the marshmallow in the microwave on top of a striped cookie.  Microwave for 10 seconds (no longer unless you want a tough marshmallow)!


3)  Put another cookie on top.  Enjoy your "melted" snowman!


My friend gives these treats to others at Christmas time.  If you want to share them, be sure to let the frosting dry completely, then place 2 cookies and one snowman marshmallow into a cellophane bag.  Include directions to microwave for 10 seconds! 


(Update:  You can download a customizable, printable version here.)

Labels: ,

Tuesday, January 18, 2011

Tasty Tuesday: Snowman Cracker Snack

By now, you know I often substitute items I don't have/can't find when I'm doing a project!  This snowman snack is no exception!  The ingredients in parentheses are the "official" ingredients!

You need:
Crackers (or vanilla wafers)
Cream cheese (or frosting)
Chocolate chips
Red candy (we used part of a Starburst)
Carrots (or pretzels)

1)  Spread crackers with cream cheese.  Place in a snowman shape.

2)  Decorate the snowman.  We used chocolate chips for eyes and buttons, candy for mouth and hat, and carrots for the arms and nose.

"Use what you have!"  That's my motto!  It does seem like a strange flavor combination, but it was actually pretty good.  No one complained anyway! 

Labels: ,

Monday, January 17, 2011

Coffee Creamer Snowman

This morning, we attempted to make snowmen out of recycled coffee creamer containers!

Supplies:
Rinsed coffee creamer container
White paint (depending on brand of container)
Permanent markers
Scrap material/ribbon

1)  If your coffee creamer container is clear, pour some white paint and a few drops of water into it.  Replace the lid and shake, shake, shake (you'll shake it quite a bit to get the insides covered!.  Some containers (International Delight) are already white, so you don't need to do anything!

2)  Decorate a face and buttons with permanent markers.  Queasy about permanent markers?  Glue on wiggly eyes, use stickers, cut out a paper smile, etc.  The options are limitless!

3)  Extra idea:  Add a scarf from ribbon or a piece of scrap cloth. 

(I'm supposed to point out to you that the tall one - made by my oldest daughter - has on a skirt)!

Labels: ,

Friday, January 14, 2011

Fun on a Dime!


I wanted to let you know about a feature I've added to my new blog called Fun on a Dime!  Every Thursday, I'll be posting simple and inexpensive ideas for families, kids, and parents.  I also hope to highlight ideas from other blogs and readers, so if you have an easy, frugal project, send me an e-mail at motherhoodonadime @ gmail . com!

My first post was 5 Simple Activities for Kids on a Snowy Day!  Feel free to check it out!  :)

Labels: , ,

Thursday, January 13, 2011

Snowman Soup Relay

Crescendo Gal, a Facebook reader, shared with me the idea of "Snowman Soup" -- hot chocolate with melted marshmallows.  I added the idea of a relay for a fun little game with a warm treat at the end.

Supplies:
Marshmallows
Spoon
Mug of hot chocolate


1)  Place the mugs on one end of the kitchen (dining or any other room).  Place a marshmallow on the spoon, walk carefully to the mug, and place the marshmallow in the cup.  Repeat with as many marshmallows as desired.

The perfect treat after a morning out in the snow!

Labels: ,

Monday, January 10, 2011

Snowy Snowman Painting (With a Marshmallow Paintbrush)

Painting with marshmallows?  Sounds good and messy!

Supplies:
White paper
Blue paper
Cup or other circle template
Scissors
Glue
White paint
Marshmallows
Toothpicks (if desired)

1)  Trace three circles onto white paper.  Cut.

2)  Glue the circles onto the paper in a snowman shape.  Add a hat, if desired.

3)  Draw on a face and any other decorations.  Dip a marshmallow in paint, press onto the paper, and enjoy the "snow'!!

If you choose to poke the marshmallows with a toothpick (and use as a handle of sorts), supervise carefully!  Also, make sure your little ones do not eat painted marshmallows!!

Labels: , ,